Almond Butter Cookies

Almond Butter Cookies

  • Prep Time: 10 minutes
  • Cook Time: 10 minutes
  • Portions: 12 cookies
  • Glycemic Index (GI): 20 Low
  • Glycemic Load (GL): 2 Low

Ingredients:

  • 1 cup almond butter
  • 1 large egg
  • 1/3 cup almond flour
  • 1/4 cup sugar substitute (e.g., stevia or erythritol)
  • 1 teaspoon vanilla extract

Instructions:

  1. Preheat Air Fryer: Preheat your air fryer to 350°F.
  2. Mix Ingredients: In a mixing bowl, combine almond butter, egg, almond flour, sugar substitute, and vanilla extract. Mix well until smooth dough forms.
  3. Prepare Air Fryer Basket: Line the air fryer basket with parchment paper to prevent sticking.
  4. Shape Cookies: Scoop out 1 tablespoon of dough at a time and roll into balls. Place the dough balls on the parchment paper, spacing them evenly. Flatten each ball with a fork to create a crisscross pattern.
  5. Bake: Bake the cookies in the preheated air fryer for 8-10 minutes, until golden brown around the edges but still soft in the center. They will firm up as they cool.
  6. Cool and Serve: Let the cookies cool on a wire rack. Serve with a glass of almond milk or enjoy on their own.

These almond butter cookies are a delicious, low-carb option that combines the nutty richness of almond butter with the sweet flavor of a sugar substitute. Enjoy them as a guilt-free treat!
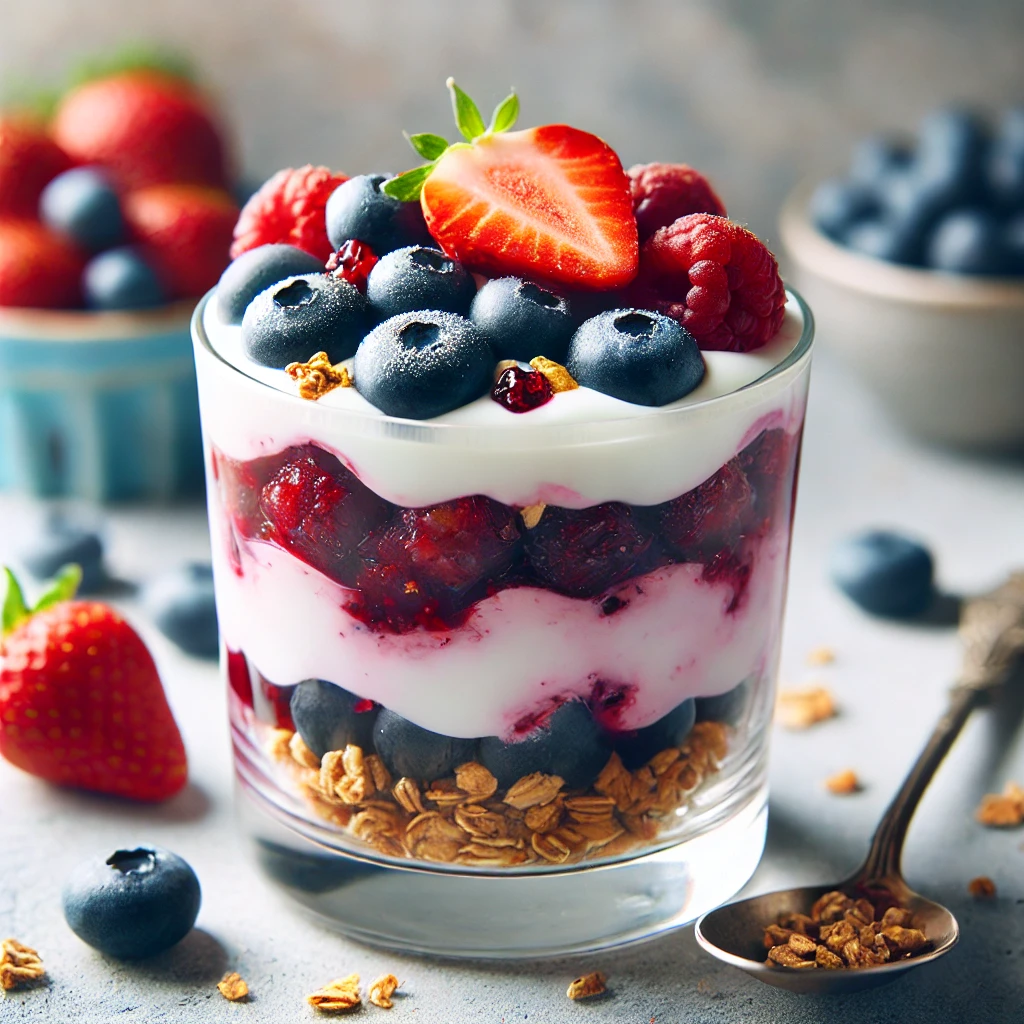
Berry Compote with Greek Yogurt

Berry Compote with Greek Yogurt

Prep Time: 10 minutes
Cook Time: 20 minutes
Portions: 4 servings
Glycemic Index (GI): 25 Low
Glycemic Load (GL): 5 Low

Ingredients:

  • 1 cup strawberries, washed and hulled
  • 1 cup blueberries, washed
  • 1 cup raspberries, washed
  • 2 tablespoons lemon juice
  • 2 tablespoons sugar substitute (stevia or erythritol)
  • 2 cups Greek yogurt
  • 1/4 cup low-sugar, whole-grain granola (optional)

Instructions:

  1. Prepare the Berries: Wash and hull the strawberries. Combine the strawberries, blueberries, and raspberries in a medium saucepan.
  2. Add Lemon Juice and Sweetener: Pour in the lemon juice and add the sugar substitute. Stir well to combine.
  3. Cook the Compote: Set the saucepan over low heat. Let the berries simmer, stirring occasionally, for about 15-20 minutes. The berries will release their juices and thicken into a compote. For a smoother texture, mash the berries with a fork or use an immersion blender.
  4. Layer with Greek Yogurt: In parfait glasses, layer the Greek yogurt and berry compote. Start with a spoonful of yogurt, then add a layer of compote. Repeat until the glasses are full, ending with a dollop of compote on top.
  5. Add Granola (Optional): Sprinkle a handful of low-sugar granola on top for added crunch.

Serving Suggestion: Enjoy as a refreshing dessert or nutritious snack. The berry compote can be stored in the refrigerator for up to a week, making it a convenient addition to your meals.

Low-Carb Cheesecake

Low-Carb Cheesecake

Prep Time: 15 minutes
Cook Time: 30 minutes
Portions: 8 servings
Glycemic Index (GI): 15 Low
Glycemic Load (GL): 2 Low

Ingredients:

  • 2 packages of cream cheese (softened)
  • 2 large eggs
  • 1 teaspoon vanilla extract
  • 3 tablespoons sugar substitute (e.g., stevia or erythritol)
  • 1 cup almond flour (for crust)
  • 2 tablespoons melted butter (for crust)
  • 1 tablespoon sugar substitute (for crust)

Instructions:

  1. Prepare the Crust:
    • In a bowl, mix almond flour, melted butter, and 1 tablespoon of sugar substitute until well combined.
    • Press the mixture evenly into the bottom of a small springform pan that fits your air fryer.
  2. Make the Filling:
    • In a separate mixing bowl, beat the softened cream cheese until smooth and creamy.
    • Add the eggs one at a time, beating well after each addition.
    • Mix in the vanilla extract and sugar substitute until fully incorporated.
    • Pour the filling into the prepared crust and smooth the top with a spatula.
  3. Bake the Cheesecake:
    • Preheat the air fryer to 300°F.
    • Place the springform pan in the air fryer basket and cook for 25-30 minutes, or until the edges are set but the center is slightly jiggly.
    • Let the cheesecake cool in the air fryer for a few minutes, then transfer it to the refrigerator to chill for at least 2 hours.

Serving Suggestions:

  • Lemon Zest: Add lemon zest to the cream cheese mixture before baking for a refreshing citrus flavor.
  • Berry Compote: Simmer a mix of berries with a tablespoon of water and a teaspoon of sugar substitute to create a berry compote. Spoon over chilled cheesecake slices for a burst of natural sweetness.
  • Toppings: Drizzle with sugar-free chocolate sauce or caramel, or serve with whipped cream and fresh berries.

Enjoy your low-carb, diabetic-friendly cheesecake!

Air-Fried Cinnamon Banana Bites

Air-Fried Cinnamon Banana Bites

Prep Time: 5 minutes
Cook Time: 10 minutes
Portions: 2 servings
Glycemic Index (GI): Moderate (51-55)
Glycemic Load (GL): Low (5-7)

Ingredients:

  • 2 ripe bananas
  • Coconut oil spray
  • 1 teaspoon ground cinnamon

Instructions:

  1. Prepare the Bananas: Peel the bananas and slice them into rounds about ¼-inch thick. Ensure all slices are of uniform thickness for even cooking.
  2. Season the Slices: Arrange the banana rounds in a single layer on a plate or tray. Lightly spray them with coconut oil and sprinkle generously with ground cinnamon.
  3. Air Fry the Banana Bites: Preheat your air fryer to 350°F (175°C). Once preheated, place the banana slices in a single layer in the air fryer basket, making sure they do not overlap. Cook for 8-10 minutes, flipping halfway through to ensure even cooking. Watch them closely towards the end to avoid over-browning.
  4. Serve and Enjoy: Once done, remove the banana bites from the air fryer. Allow them to cool slightly before serving.

Serving Suggestions:

  • Pair with Greek yogurt for added creaminess and protein.
  • Garnish with chopped nuts like almonds or walnuts for extra crunch.

These air-fried cinnamon banana bites are a delightful, guilt-free treat that is naturally sweet and full of fiber. Enjoy them as a standalone snack, a topping for oatmeal, or a healthy dessert option.
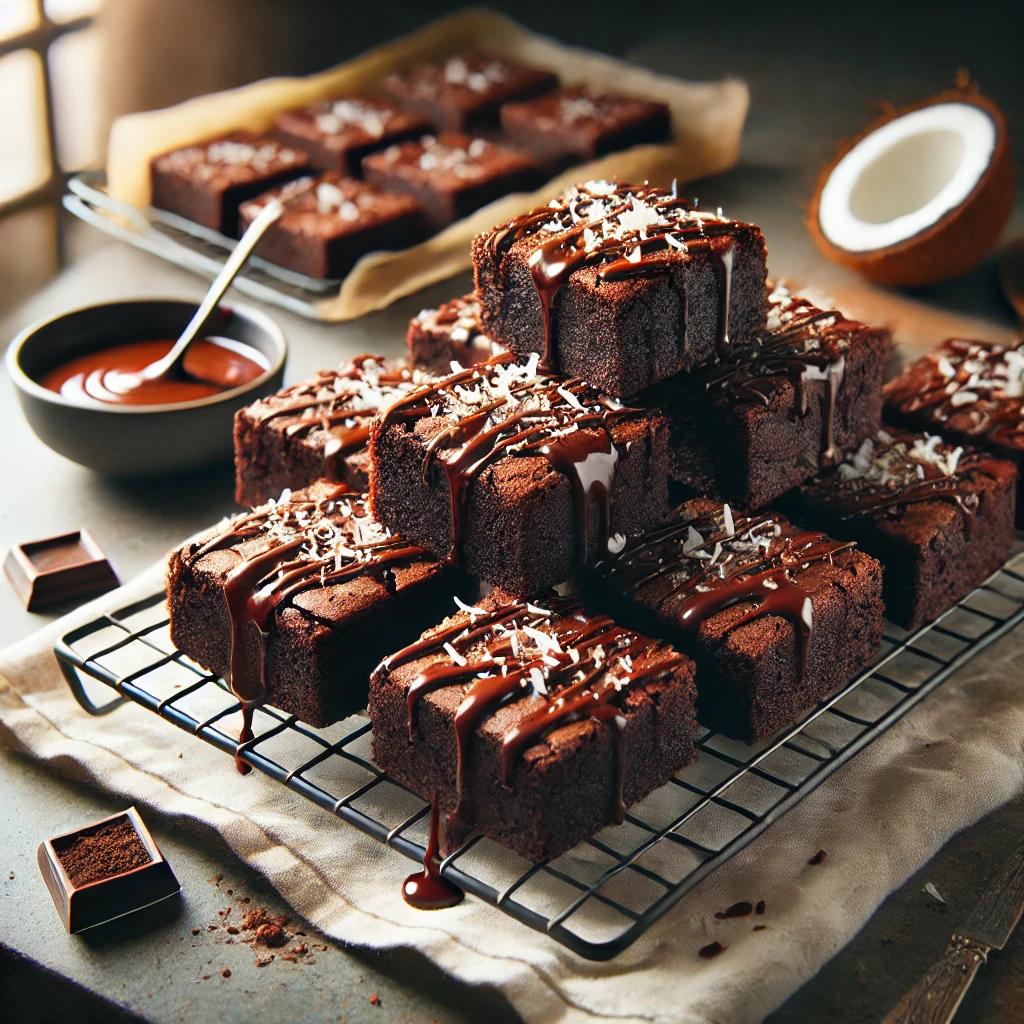
Coconut Flour Brownies

Coconut Flour Brownies

Prep Time: 10 minutes
Cook Time: 20 minutes
Portions: 9 servings
Glycemic Index (GI): 45
Glycemic Load (GL): 5 per serving

Ingredients:

  • Half a cup of coconut flour
  • A quarter cup of unsweetened cocoa powder
  • Four large eggs
  • Half a cup of melted coconut oil
  • A sugar substitute such as monk fruit or erythritol

Instructions:

  1. Preheat Air Fryer: Set your air fryer to 350°F to preheat.
  2. Mix Dry Ingredients: In a mixing bowl, combine the coconut flour and unsweetened cocoa powder, ensuring there are no lumps.
  3. Mix Wet Ingredients: In a separate bowl, whisk the eggs until frothy. Add the melted coconut oil and sugar substitute, mixing until well combined.
  4. Combine: Gradually add the wet ingredients to the dry ingredients, stirring until you have a smooth, thick batter. If the batter is too thick, add a splash of almond milk to reach the desired consistency.
  5. Prepare the Baking Pan: Line a small baking pan that fits your air fryer with parchment paper.
  6. Bake: Pour the brownie batter into the prepared pan, spreading it evenly. Place the pan in the preheated air fryer and bake for about 15-20 minutes. Check for doneness by inserting a toothpick into the center. If it comes out clean or with a few moist crumbs, the brownies are ready.
  7. Cool: Allow the brownies to cool in the pan for a few minutes before transferring them to a wire rack to cool completely.

Serving Suggestions:

  • Serve with a scoop of sugar-free ice cream for an indulgent treat.
  • Drizzle with a low-carb chocolate sauce made by melting sugar-free chocolate chips with a splash of heavy cream.

Enjoy the fudgy goodness of these diabetic-friendly coconut flour brownies, rich in fiber and healthy fats, perfect for a guilt-free dessert!

Chocolate Avocado Mousse

Chocolate Avocado Mousse

Prep Time: 10 minutes
Cook Time: 0 minutes
Portions: 4 servings
Glycemic Index (GI): Low (approximately 15)
Glycemic Load (GL): Low (approximately 3 per serving)

Ingredients:

  • 2 ripe avocados
  • 3 tablespoons unsweetened cocoa powder
  • Sugar substitute (stevia or erythritol) to taste

Instructions:

  1. Halve and pit the avocados. Scoop the flesh into a high-speed blender or food processor.
  2. Add the unsweetened cocoa powder and your chosen sugar substitute.
  3. Blend the mixture on high until it reaches a smooth, lump-free consistency. You may need to stop and scrape down the sides of the blender a few times to ensure even mixing.
  4. Taste the mousse and adjust sweetness or cocoa level to your liking. If the mousse is too thick, add a splash of almond milk until the desired consistency is achieved.

Serving Suggestions:

  • Garnish with fresh berries (such as raspberries or strawberries) for added natural sweetness.
  • Add a dollop of sugar-free whipped cream for a light, airy contrast.
  • Sprinkle cacao nibs or a dash of cinnamon on top for added crunch and flavor.

Nutritional Benefits:
This chocolate avocado mousse is packed with healthy fats and fiber, both of which are beneficial for managing blood sugar levels. The use of a sugar substitute keeps it low in carbohydrates, making it suitable for those managing diabetes. The combination of avocados and cocoa powder provides a rich, creamy dessert that satisfies your sweet tooth without compromising your health goals.
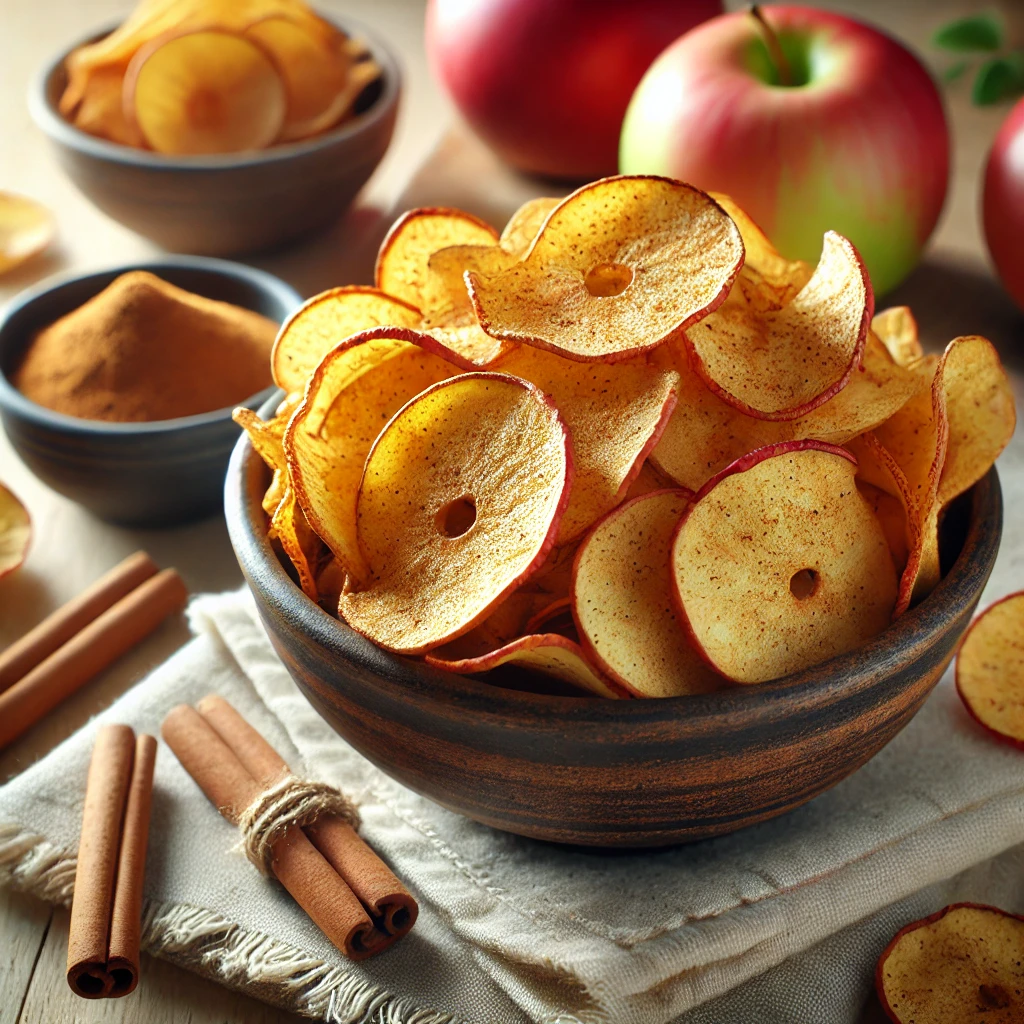
Air-Fried Apple Chips

Air-Fried Apple Chips

Prep Time: 10 minutes
Cook Time: 15 minutes
Portions: 4 servings
Glycemic Index (GI): (35-40) Low
Glycemic Load (GL): 6 Low

Ingredients:

  • 2 medium-sized apples
  • ½ teaspoon Cinnamon (optional)

Instructions:

  1. Prepare the Apples: Wash the apples thoroughly. Using a sharp knife or a mandoline slicer, slice the apples into thin rounds, about 1/8 inch thick. You can core the apples before slicing if you prefer, but it’s optional.
  2. Season the Apples: Lightly sprinkle the apple slices with cinnamon for added flavor. Cinnamon also provides health benefits, such as improved blood sugar control.
  3. Preheat the Air Fryer: Set your air fryer to 375°F and let it preheat for a few minutes.
  4. Air Fry the Apple Slices: Arrange the apple slices in a single layer in the air fryer basket. Make sure they do not overlap to ensure even cooking. Depending on the size of your air fryer, you may need to work in batches.
  5. Cook the Apple Chips: Cook the apple slices for about 10-15 minutes, flipping them halfway through to ensure they crisp up evenly. Keep an eye on them to prevent burning.
  6. Cool the Chips: Once crispy and golden brown, remove the apple chips from the air fryer and let them cool on a wire rack. The cooling process will help them become even crunchier.

Serving Suggestions:

  • Enjoy the apple chips on their own as a healthy snack.
  • Pair them with a sugar-free yogurt dip for a creamy contrast.
  • Use them as a topping for oatmeal or cereal to add natural sweetness and crunch.

Health Benefits: Air-fried apple chips are a great low-carb, low-sugar snack option for those managing diabetes. The high fiber content helps slow the absorption of sugar, promoting stable blood sugar levels. Apples are naturally sweet, and the use of cinnamon enhances the flavor while providing added health benefits, such as anti-inflammatory properties.

Edamame with Sea Salt

Edamame with Sea Salt (Air Fryer Version)

Edamame is a simple yet nutritious snack, especially for those managing diabetes. Packed with high levels of protein and fiber, edamame helps maintain stable blood sugar levels while keeping you full longer. The combination of high protein, high fiber, and low calories makes edamame an ideal low-carb snack.

Prep Time: 5 minutes

Cook Time: 8-10 minutes

Portions: 2 servings

Glycemic Index (GI): Low (15)

Glycemic Load (GL): Low (1)

Ingredients:

  • 2 cups fresh or frozen edamame pods
  • Sea salt, to taste
  • Optional: sesame seeds, lemon juice

Instructions:

  1. Prepare the Edamame: If using frozen edamame, thaw them by boiling in water for 3-5 minutes until tender but still firm. Drain well and pat dry with a paper towel to remove excess moisture.
  2. Preheat Air Fryer: Preheat your air fryer to 375°F (190°C).
  3. Season and Cook: Arrange the edamame pods in a single layer in the air fryer basket. Lightly sprinkle them with sea salt. Ensure there is enough space for air to circulate, as overcrowding can result in uneven cooking. Cook for 8-10 minutes, shaking the basket halfway through to ensure even cooking. The pods should be slightly crispy on the outside and tender on the inside.
  4. Optional Flavor Enhancements: Once cooked, sprinkle with sesame seeds or add a squeeze of lemon juice for an extra burst of flavor.
  5. Serve: Serve immediately for a warm, savory snack that is perfect for any time of day.

Serving Suggestions: Pair this edamame with a sprinkle of sesame seeds or a dash of lemon juice for an added burst of flavor. These small additions can take your snack from simple to gourmet, making it even more enjoyable.

Nutritional Benefits:

  • High in protein (17g per cup)
  • High in fiber (8g per cup)
  • Low in calories (120 calories per cup)

Air-Fried Buffalo Chicken Wings

Air-Fried Buffalo Chicken Wings

Buffalo chicken wings are a game-day favorite, but traditional recipes often aren’t the healthiest choice. By making a few smart adjustments, you can enjoy this classic snack while keeping it suitable for a diabetic-friendly diet. First, opt for skinless chicken wings. Removing the skin reduces the fat content significantly, making the wings a leaner option. Another trick is to use baking powder to achieve that desired crispy coating without the need for flour. Baking powder helps draw out moisture from the chicken, allowing the skin to become crispy as it cooks. This method ensures you get that satisfying crunch without the added carbs or calories.

Prep Time: 10 minutes
Cook Time: 25-30 minutes
Portions: 4 servings
Glycemic Index (GI): 0 (Chicken wings are a protein source and do not contribute to GI)
Glycemic Load (GL): 0 (No carbs in chicken wings)

Ingredients:

  • 2 pounds of skinless chicken wings
  • 2 tablespoons of baking powder
  • 1 teaspoon garlic powder
  • 1 teaspoon paprika
  • 1/4 cup hot sauce
  • 2 tablespoons melted butter

Instructions:

  1. Prepare the Chicken Wings: Start by patting the chicken wings dry with a paper towel to remove any excess moisture. This step is crucial for getting a crispy finish.
  2. Season the Wings: In a large bowl, toss the wings with the baking powder, ensuring they are evenly coated. Add a sprinkle of garlic powder and paprika for an extra layer of flavor.
  3. Preheat Air Fryer: Preheat your air fryer to 375°F.
  4. Cook the Wings: Once the air fryer is preheated, arrange the wings in a single layer in the basket. Be sure not to overcrowd them, as this can prevent them from cooking evenly. Cook the wings for 25-30 minutes, shaking the basket halfway through to ensure even cooking. The hot air circulating around the wings will create a crispy exterior while keeping the meat juicy and tender.
  5. Prepare the Sauce: While the wings are cooking, prepare the buffalo sauce by combining the hot sauce and melted butter.
  6. Toss the Wings: Once the wings are done, toss them in the buffalo sauce until they are well-coated.

Serving Suggestions:

For serving, consider pairing these buffalo wings with classic accompaniments like celery sticks and blue cheese dip. The cool, crisp celery provides a refreshing contrast to the spicy wings, while the blue cheese dip adds a creamy, tangy element that balances the heat. You can make a lighter version of blue cheese dip by mixing Greek yogurt with crumbled blue cheese, a bit of lemon juice, and a pinch of salt. This not only reduces the calorie content but also adds a boost of protein. Another great side option is coleslaw. A light, tangy coleslaw made with a vinegar-based dressing complements the richness of the wings and adds a crunchy texture to your snack spread.

Guacamole and Veggie Dippers

Guacamole and Veggie Dippers

This guacamole and veggie dippers combo makes for a healthy, low-carb snack that is both nutritious and delicious. The creamy guacamole paired with crunchy veggies offers a mix of flavors and textures, perfect for maintaining balanced blood sugar levels while enjoying a tasty treat.

Prep Time: 10 minutes
Cook Time: None
Portions: 4 servings
Glycemic Index (GI): 15 (Low)
Glycemic Load (GL): 1 (Low)

Guacamole Ingredients:

  • 3 ripe avocados
  • Juice of 1 lime
  • 1 small red onion, finely chopped
  • A handful of fresh cilantro, finely chopped
  • 1 diced tomato (optional)
  • 1 finely chopped jalapeño (optional)
  • Salt and pepper to taste

Instructions for Guacamole:

  1. Halve the avocados, remove the pits, and scoop the flesh into a mixing bowl.
  2. Mash the avocados with a fork until you reach your desired consistency – smooth or chunky.
  3. Add the lime juice to prevent browning and add a zesty flavor.
  4. Mix in the chopped red onion, cilantro, and any optional ingredients (tomato and jalapeño).
  5. Season with salt and pepper to taste. Mix well, and your guacamole is ready!

Veggie Dippers:

  • Cucumber slices
  • Bell pepper strips (red, yellow, or green)
  • Celery sticks

Serving Suggestions:

  • Arrange the cucumber slices, bell pepper strips, and celery sticks around a bowl of guacamole on a large platter for a visually appealing presentation.
  • For a more substantial snack, consider adding grilled shrimp as a savory, protein-packed dipper.

This guacamole and veggie dippers combo is perfect for a healthy, low-carb snack that’s both nutritious and delicious. The creamy guacamole paired with the crunchy veggies provides a satisfying mix of flavors and textures, making it an ideal option for anyone looking to maintain balanced blood sugar levels while enjoying a tasty treat.